
Basic Keywords explained – Practice Session
Downloads
Basic Keywords Practice Session – Article
In this article from my free Java 8 course, we will apply what we learned in my Java 8 Course Introduction to our first real Java program. If you haven’t yet, I would recommend that you read it using the link above, so that you can understand the concepts that we are applying here.
Writing a Test
Whenever you write a program, you start by writing a test. Tests are extremely useful for a variety of reasons. A test allows the programmer to properly think through his idea, which will result in a cleaner final result. The test also serves as a formal definition of what needs to be done, and can be used for discussions with the client, before a single line of code for the program has been written. It gives a programmer the chance to ask: “Is that what you actually need?”
Another reason to write tests is that it will help in writing cleaner code. A test gives an external view on your program – if your code is difficult to use, you will experience the pain, and this will make you refactor and improve it. When this happens to me, I usually say: “The test speaks to me”.
Last but not least, for every refactoring or new feature added to the code, the test acts as a safety net. Whenever you introduce a bug, in the ideal case, a test, running automatically after each change to the code – will fail. The test can show you the exact code line that “broke” the test, so you can instantly move in the right direction towards fixing the bug. A failing test is usually visualized as a red bar, and a passing test as a green bar, so we often speak of “green” and “red” tests instead of passing and failing tests.
PersonTest
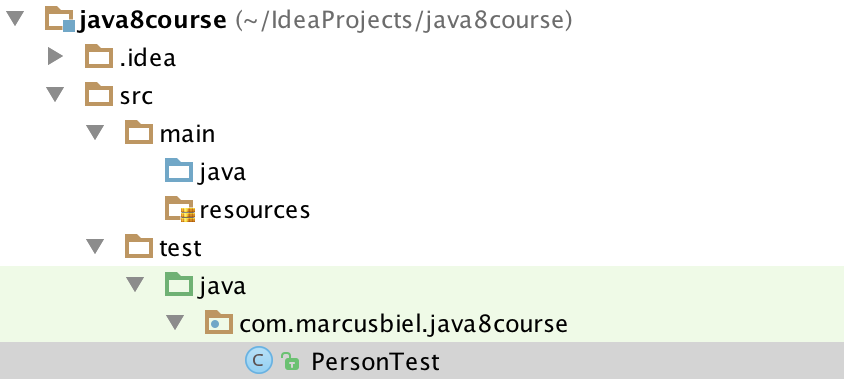
Now that I’ve explained why we should write a test, let’s start to code! In Example 1, I’ve navigated to a PersonTest class that I just created. I’m in my program editor or IDE (integrated development environment) which is where we write our code. There are a variety of IDEs for Java and each has its own specific functions. Generally, they act as editors for your code, highlighting different keywords, pointing out errors, and assisting you in your coding. An IDE is extremely useful and makes every step of the programming process easier for the programmer.
For example, they help programmers by completing lines of code, automatically creating package structures, and auto-importing packages when they are used. However, I think that an IDE is a crutch for those who are learning to code. It doesn’t allow you to completely understand what you’re doing and how you’re doing it and if at some point you can’t use an IDE, you wouldn’t be able to function without it. For that reason, I’d recommend you start coding by using a simple text editor and compiling from the console until you’ve completed the first twenty lessons of this course. This will allow you to focus on learning the key aspects of Java without the assistance of the IDE.
Example 1
If you look back to Example 1, the test classes are all in a folder structure src/test/java, and the non-test code will be stored in src/main/java. A package name is basically identical to a folder structure, but Java gives the latter a special meaning. So our package name of com.marcusbiel.java8course will end up in a folder structure of com/marcusbiel/java8course. Remember, the folder structure must be identical to the package name in the Java class, Java will check that!
Now, back to our class. We have to start with our package declaration. For our package structure to match the folder structure explained above, we have to declare our package, com.marcusbiel.java8course at the top of our class. To end the statement we have to put a semicolon. Here’s how it looks all together:
package com.marcusbiel.java8course;
Example 2
Next I define my class, which is called PersonTest. I do this by first typing public, followed by class, and finally the class name PersonTest. Then I add opening and closing curly braces. Between the curly braces is where you write your code.
package com.marcusbiel.java8course;

public class PersonTest {

}
Example 3
@Test and our test method
According to the JUnit 4 documentation, the annotation @Test tells JUnit that the public void method to which the annotation is attached can be run as a test case. If we run the test and the test condition is not met, the test will fail.
To use the JUnit @Test annotation we import it first, as you can see in Example 4 below:
import org.junit.Test;
Example 4
As stated above, a Junit 4 test method must be public void, and must not contain any parameters. Apart from that, for the name of the method we can freely choose any name we would like to. Generally, while testing, focus on what your program should do, not how this is done. This can be encouraged by following a very simple rule: start the name of your test method with “should”, followed by what you expect the method to do, from a client’s perspective.
In our case we’ll call our test method shouldReturnHelloWorld(). “Hello World” is a running gag in the world of programmers where the first program that you write in any language should always return “Hello World”. Needless to say that my course isn’t going to break that rule :).
Finally, above our test method, we add the annotation @Test to tell JUnit that this method is a test case, as explained above. Here’s what our code looks like at this point:
package com.marcusbiel.java8course;
import org.junit.Test;
public class PersonTest {
    @Test
    public void shouldReturnHelloWorld() {

    }
}
Example 5
Variables
Ok, let’s write the test! In this test we expect a Person object to return “Hello World” to us. In Java, plain text like “Hello World” is a specific type of data called a String. So in this test method, we’re expecting to receive a String “Hello World”. We haven’t actually written any code for the Person object to do this, but we’re starting in reverse by starting with a test, so you can assume that the Person class is done, even though your compiler will tell you that it’s not.
For this Person we’ll create a variable. We need a name for our variable; I’m going to call mine marcus. So to create the variable, we call the constructor, create the object of type Person in the memory, and assign it to the variable named marcus, as you can see below.
package com.marcusbiel.java8course;
import org.junit.Test;
public class PersonTest {
    @Test
    public void shouldReturnHelloWorld() {
         Person marcus = new Person();
    }
}
Example 6
You’ll probably see that the Person class from Example 5 is red. This is because our Person class hasn’t been created yet, but we’ll take care of this later. Like I talked about above, this is a central part of writing a test. We’re first going to create our test, in full, and then after that we’ll create the classes and methods necessary to make it pass.
assertEquals
We can check that the method is returning “Hello World” with the help of the static JUnit assertEquals() method. We import this method by adding the assertEquals method below our other import statement, as you can see in Example 6. This is a special kind of import called a static import, which I explain in this article.
import static org.junit.Assert.assertEquals;
Example 7
The assertEquals() method expects two arguments. The first value is the expected value, the second value the actual value. Expected and actual value must be equal, otherwise, the assertEquals() method will throw an error and the test will fail.
As the first argument, we put the String “Hello World”, as this is what we expect our helloWorld() method to return. As the second argument, we directly put the helloWorld() method call, as it will return the actual value. Here’s what this looks like all put together:
package com.marcusbiel.java8course;
import org.junit.Test;
import static org.junit.Assert.assertEquals;
public class PersonTest {
       @Test
       public void shouldReturnHelloWorld() {
       Person marcus = new Person();
       assertEquals("Hello World", marcus.helloWorld() );
   }
}
Example 8
Currently, the code shown in Example 7 won’t work because we still have to implement the class Person. We also still haven’t created a helloWorld() method since we haven’t created the class (both highlighted in red). So now let’s create this class and the method. Since this is a method of type String, it must return a String. So in this case, our Person class will return the String “Hello World”. In the last article I mentioned the difference between command methods and query methods. This helloWorld() method is the first query method we have written. It doesn’t change the state of the Person class, however it returns something. Take a look at our Person class so far:
package com.marcusbiel.java8course;

public class Person {


    public String helloWorld() {
         return "Hello World";
    }
}
Example 9
If we now execute our test, we get a green bar, so the test passed successfully! This proves that we have correctly implemented our first working code! Hooray 🙂